
Installation
Setup_TVMPlayout.exe launch and follow the signs.
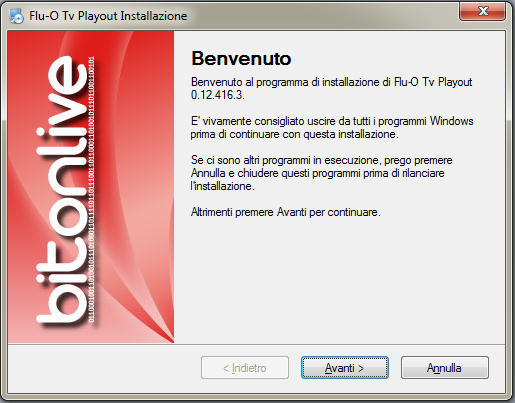
We recommend installing Flu-O TV Playout folder recommended (C: \ Program Files (x86) \ BitOnLive \ Flu-O TV Playout)
License Updater
After installing the software open the Windows Start menu -> BitOnLive-> License Updater
This will open the next window in which to enter e-mail and code to activate the purchased license.
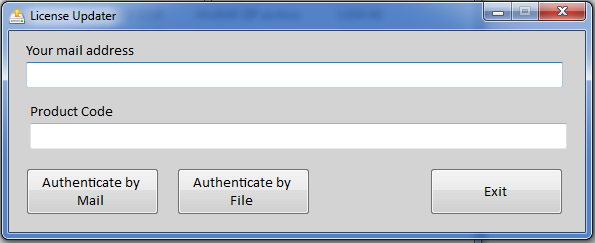
The e-mail address you will be sent an e-mail from license@bitonlive.com containing a file, save it to your desktop and start Flu-O to activate it.
Configuration
Click the icon to launch the TV Playout Configuration. In the first mask, set the shared folder, the folder where to find the data and write the program logs and select the channel and the computers. Click the Edit button to set the parameters of the channel: the new tab will appear.
Script
Under Script you can generate the instructions that will be applied when you start the software. 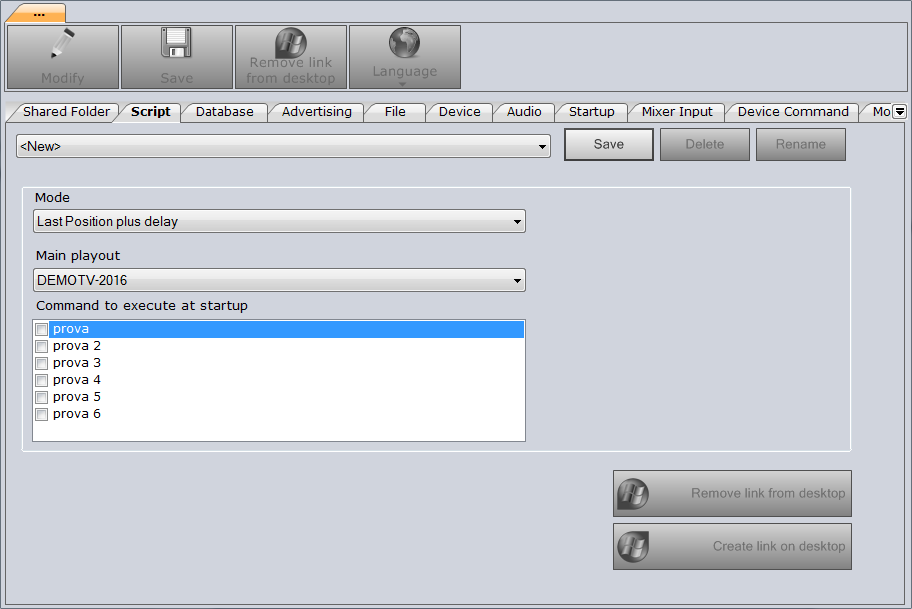
Mode is the start mode, that is how it should be loaded playlist:
- Since the beginning
- Last position (relative to the main playout to point to the next field)
- Last position delay (for delay is the time of starting the software)
- Current time
Command to run at startup
They lists the commands Device Manager set Philo Media Manager
Database
Select the type of database used.
- Auto (default)
- Internal
- MySql

Advertising
Settings
It contains the configuration of the area / Split transmitted by the playout and allows an automation of combining the beginning and end of the advertising bar. Automations must have been previously created in Philo Media Manager.
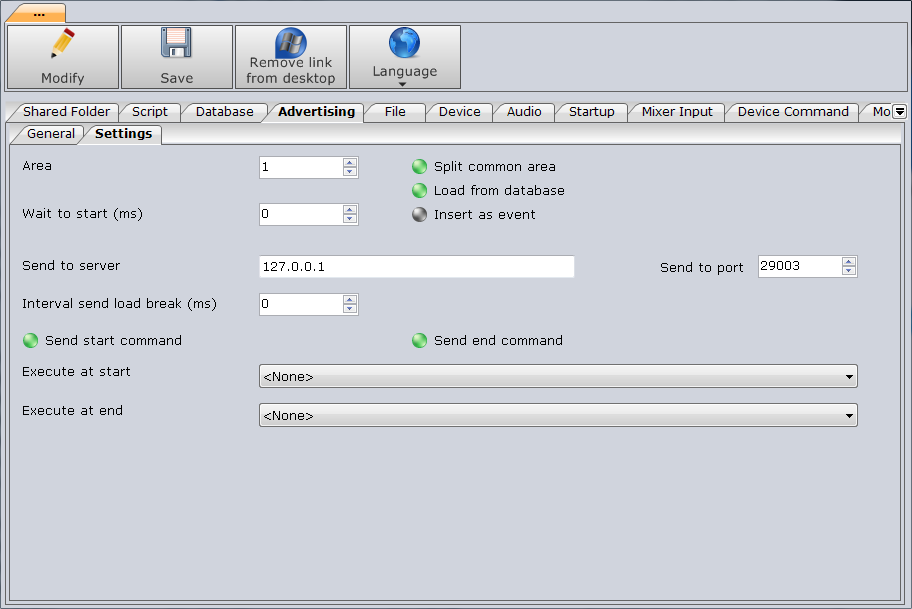
- Area: Insert the Area number
- Wait to start: delay for the split command
- Send to server: Split server address
- Send to port: Server comunication port
- Intervalsend load break:
- Send start/end command: enable or disable the start/end command execution
- Execute at start/end: Select the command to execute at the start/end
- Split common area: send the split command even in presence of the only common area
- Load from database: Before the Adv Break reload the commercials data from the database
- Insert as event: Insert the Adv Break at the planned time with no need to schedule them
General
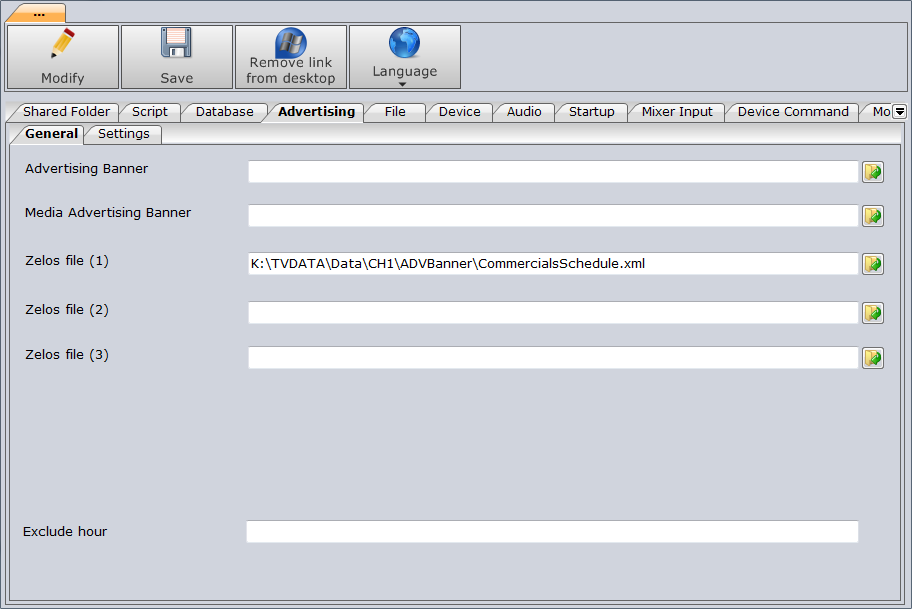
Select the folders where the files are located with the programming and advertising banners.
- Banner advertising
- Media banner advertising
- Zelos file (1-2-3)
File
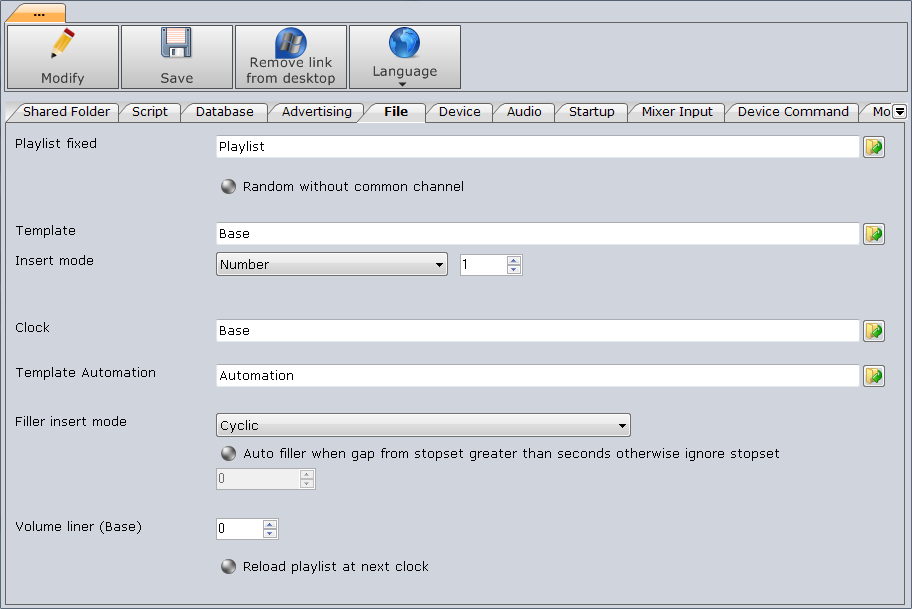
- Fixed schedule: is the default playlist, in the absence of scheduled programming of basic template and basic clock, will be loaded from airing, the management of the file takes place in Philo.
- Template: list offers templates created in Philo, The selected one will be loaded if no schedule.
- Clock: The list proposes the clock created in Philo, The selected one will be loaded if no schedule and template.
- Template automation: automation is created in Philo, Select the one to apply.
- Filler insert mode: indicates the type of selection of filler. Cyclic With the program will attempt to rotate the greatest possible number of files, with duration through the file selection priority will be given to the always time to fill and therefore to the length of the file. We recommend you to set the duration of the archive if the filler is wide and varied in terms of duration of the file.
- Auto Filler when gap from stopset greater than seconds, otherwise ignore stopset: enable the function. set how many seconds
- Reload playlist at next clock: if enabled, reload the scheduling modification at the next clock
- Volume liner (base): set up the volume decrease for the base during the Liner or Voice Over play
Device
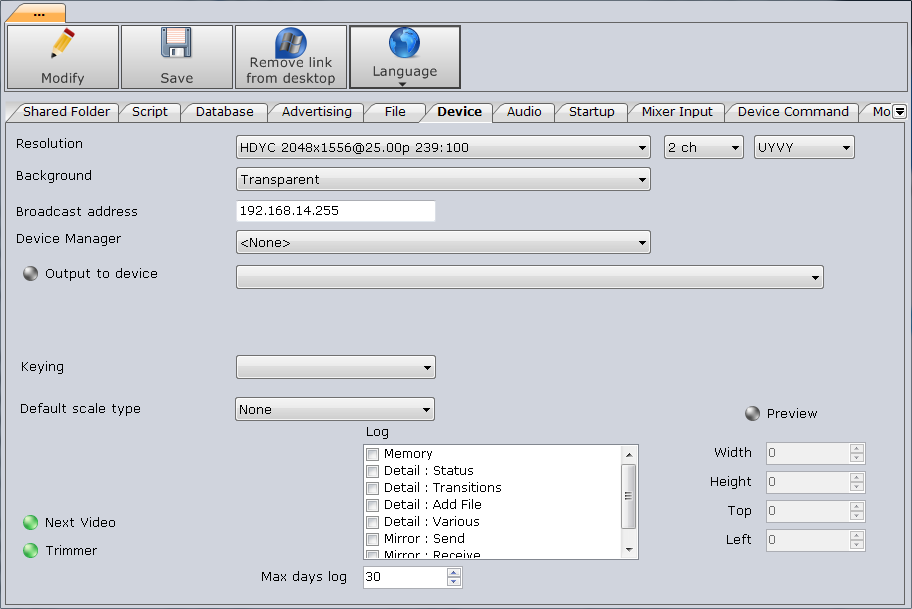
- Resolution: Choose the screen resolution (eg. HD 1080 – 50i) and audio channels.
- Background: Select the color of the video in the absence of images (eg. Black).
- Broadcast Address: enter the IP address of the network
- Device manager: if installed, select the reference computer.
- Output device: select the video output device
- Log: Select the information to write in the log files
- Preview: enable the main output simulation on the screen coordinates indicated
Audio
In this tabi s possible to enable the Audio Processor by clicking on the two checkbox.
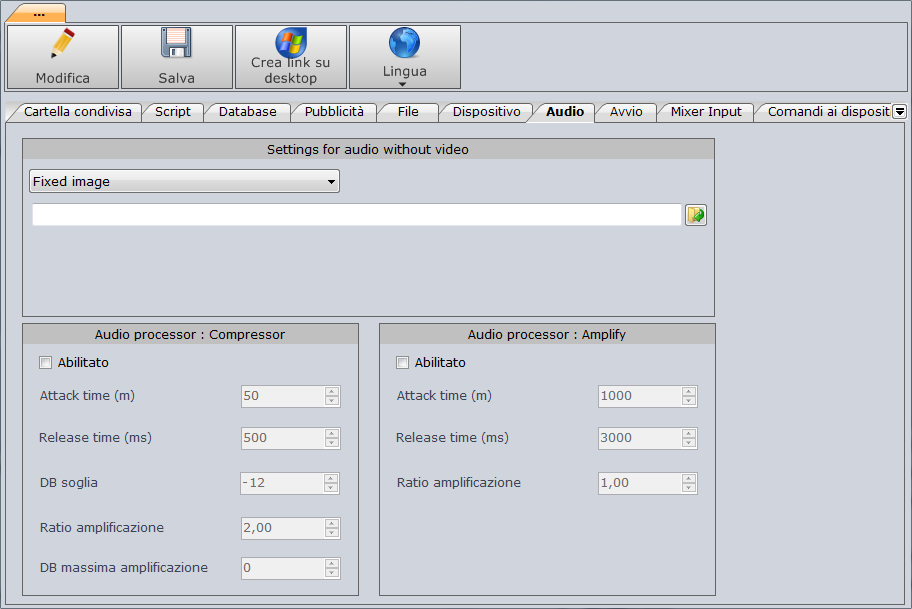
Setting for audio whitout video
Here user can choose the showing content for all the items without video or cover image.
Fixed Image

Insert the path and the name of the image. It will be scaled to the main output size.
If there is a reference to image or video in the Philo Media Manager archive, those will be trasmitted.
Automation

Selecting Automation, FluO apply the automation already created on Philo Media Manager.
- File from libraries: automation to perform on the archived item.
- Manual selected file: automation to perform on the externar element loaded.
If there’s no automation selected, FluO don’t show any image, even if present in the archive.
Audio processor: Compressor
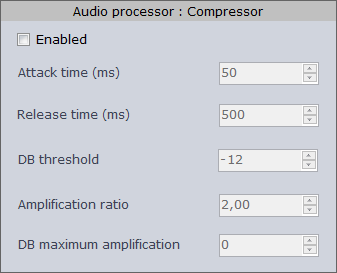
- Enabled: enable or disable compressor
- Decay time
- Db Gain
- Db Threshold
Audio processor: Amplifier
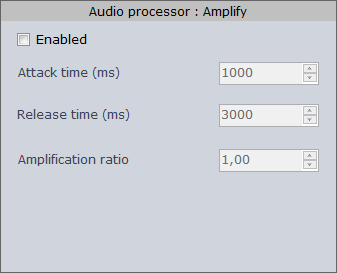
- Enabled: enable or disablre the amplifier
- Attack time
- Release time
- Db Max Amplification
Startup
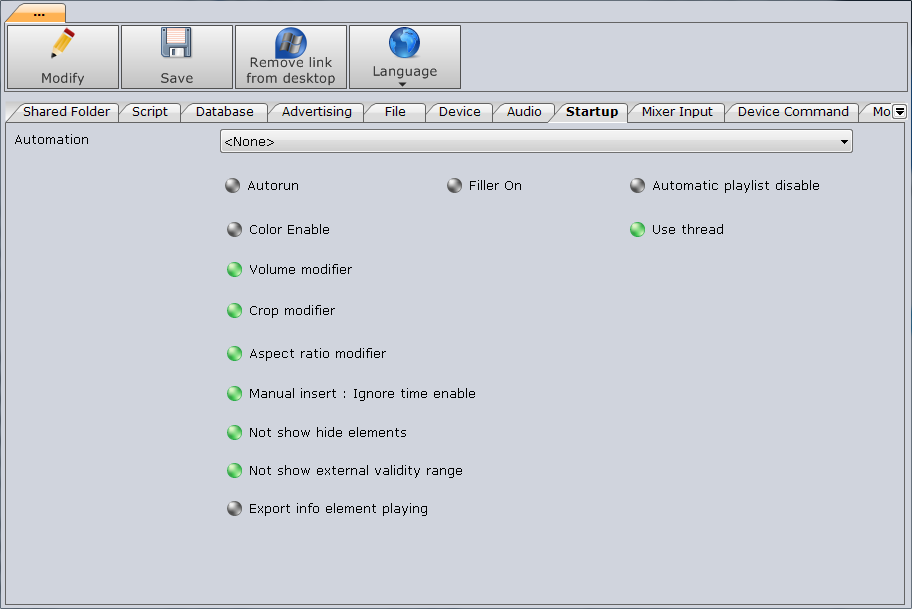
In the playout configuration user can choose an automation to execute at the start of FluO
- Autostart: if enabled the player start playing automatically at the program start
- Filler ON: if enabled, FluO fill all the empty scheduled times with the items set in the Filler list on Philo Media Manager
- Automatic playlist disable: Disable the automatic playlist load
- Color Enable: eneble the color setup in Philo Media Manager
- Volume modifier: enable the volume modifier.
- Crop modifier: enable the crop modifier.
- Aspect Ratio modifier: enable the Aspect Radio modifier
- Manual insert: if enabled FluO ignore the validity or the disabled time in Philo Media Manager while the user make a manual insert
- Not show hide elements
- Not show external validity range
- Export info playing element: Export txt file with the element info usable for the RDS or the streaming metadata.
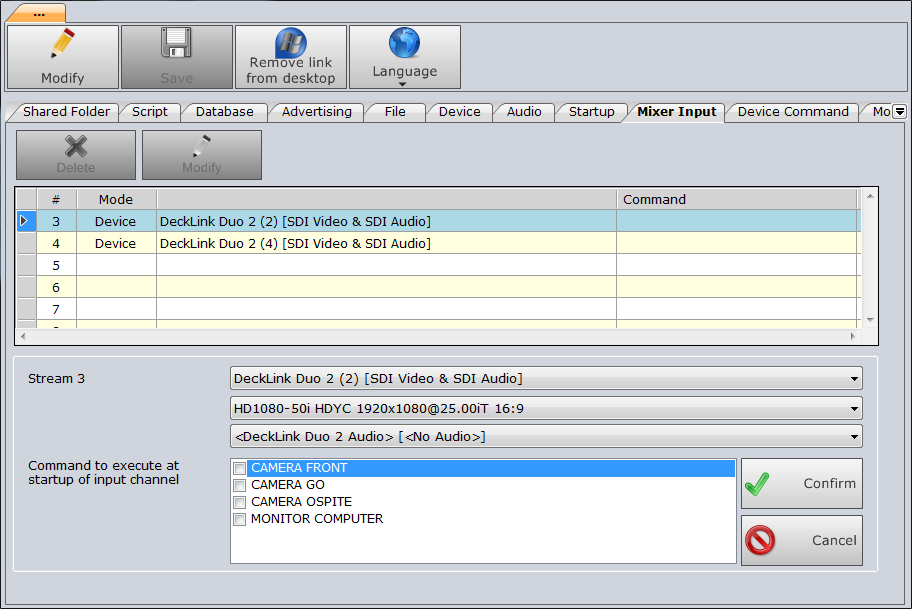
Input
List of available inputs, for each of which can be set:
- File: You can select a video file directly, which could be used as animated wallpaper.
- Playlist manual: you can create a playlist manually in Philo and match it to the stream.
- If you have an acquisition card will be displayed in the list
If it also installed Device Manager you will see a list of automated set (Philo Media Manager).
Device command
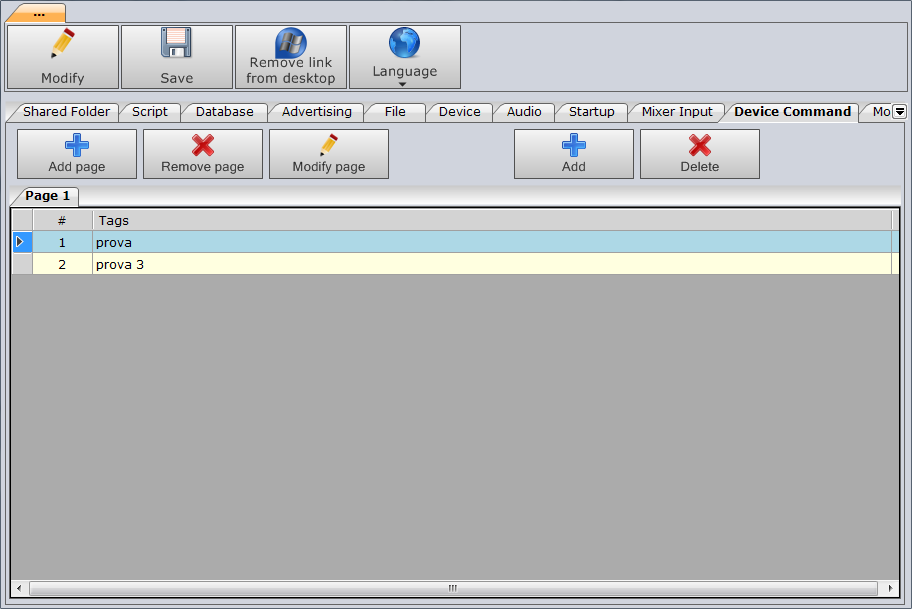
This is the form where you set your keys to control external devices directly from the playout (Tools) Then push the Add button to add and check off the action proposed in the list; click Add page to add pages (tab). Click Save to save your changes.
Monitor
Setting the emergency system (Monitor) and mirroring.
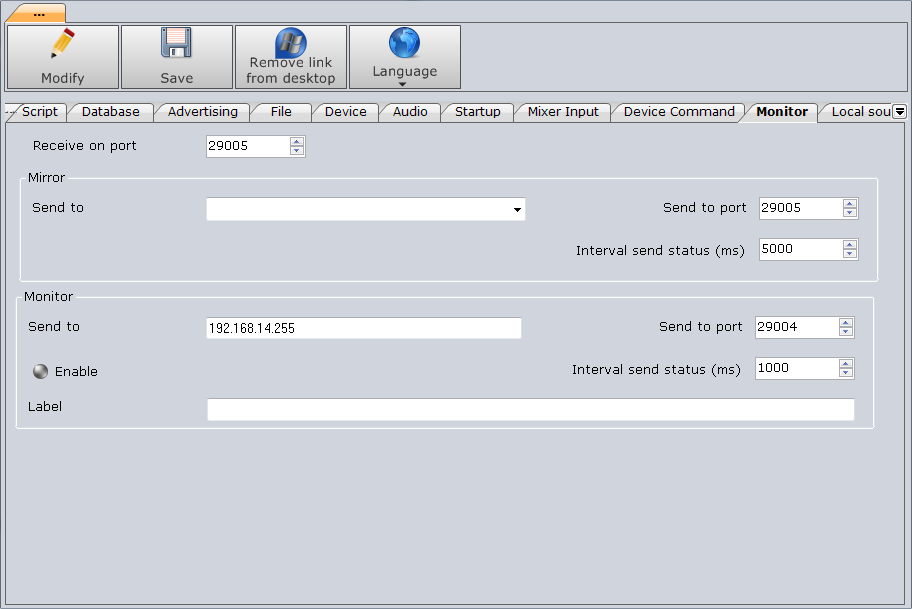
- Receive on port: UDP port for the command receive
Mirror
- Send to: select from the slidebox the Computer for the mirror function
- Send to port: UDP port for the mirror comunication
- Interval send status: milliseconds of interval for the status sending
Monitor
- Send to: IP addres of the Monitor Computer
- Port: UDP comunication port
- Enable: enable or disable the monitor status send
- Interval send status: milliseconds of interval for the status sending
- Label: label to send to the monitor computer
Local source
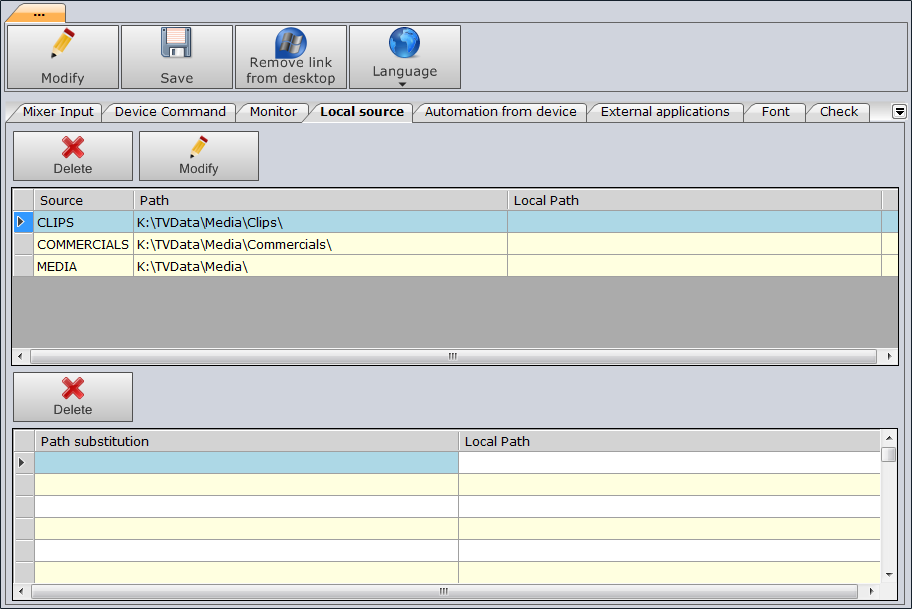
Lists the sources set in Philo and it is possible to change them in case they are locally different.
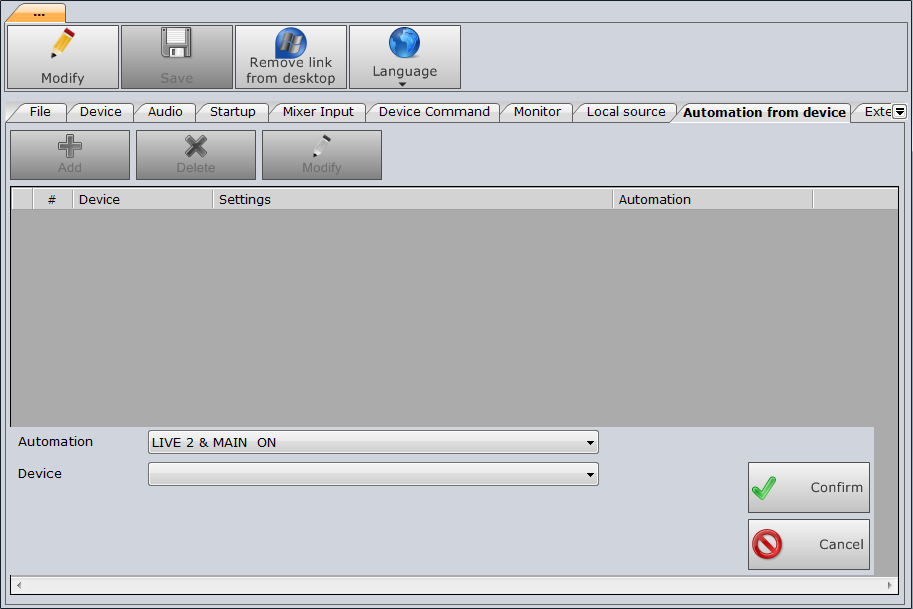
Automation of device
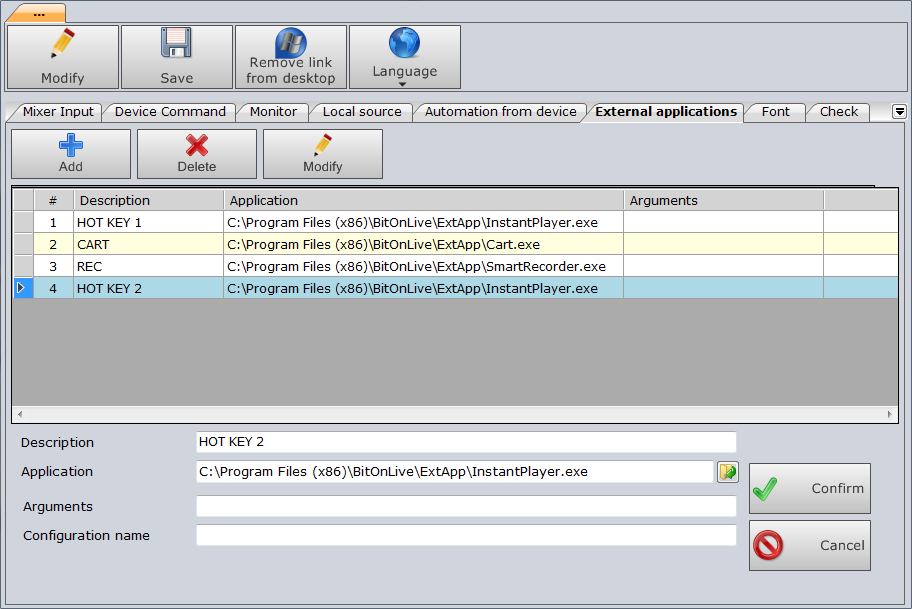
External Application
List of external app that can be added to the playout interface. (Smart recorder, Instant player, cart, etc.)
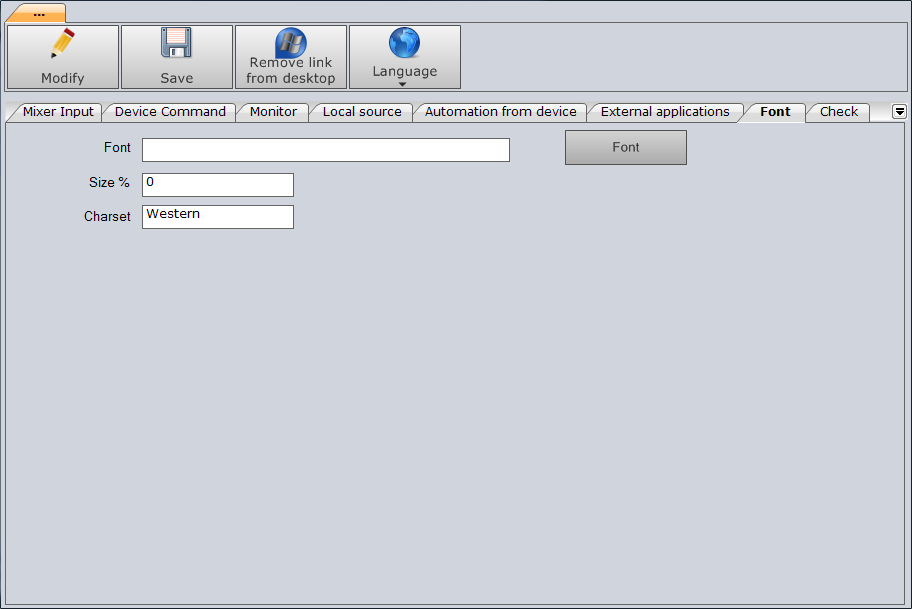
Font
With this tab, user can change the font.
Controlli
Set the rules that FluO must respect in the item selection in case of absence of the daily playlist.
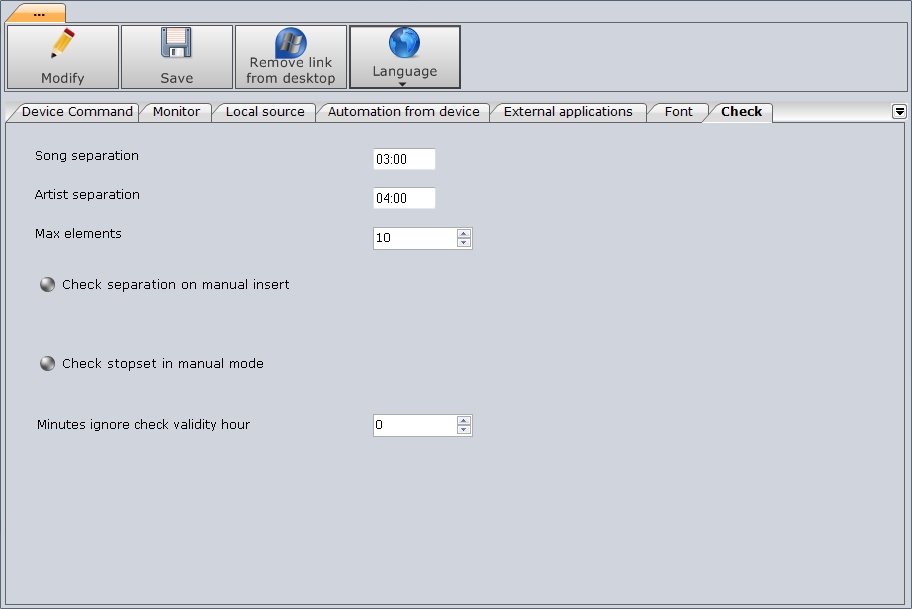
- Song separation: Minute and seconds of separation for the same song
- Artist separation: Minute and seconds of separation for the same artist
- Max elements: Number of elements to select from next
- Check separation on manual insert: enable or disable
- Check stopset in manual mode: enable or disable
- Minutes ignore validity hour: disable the check on the hour validity from the selection items within the indicated time
Workspace
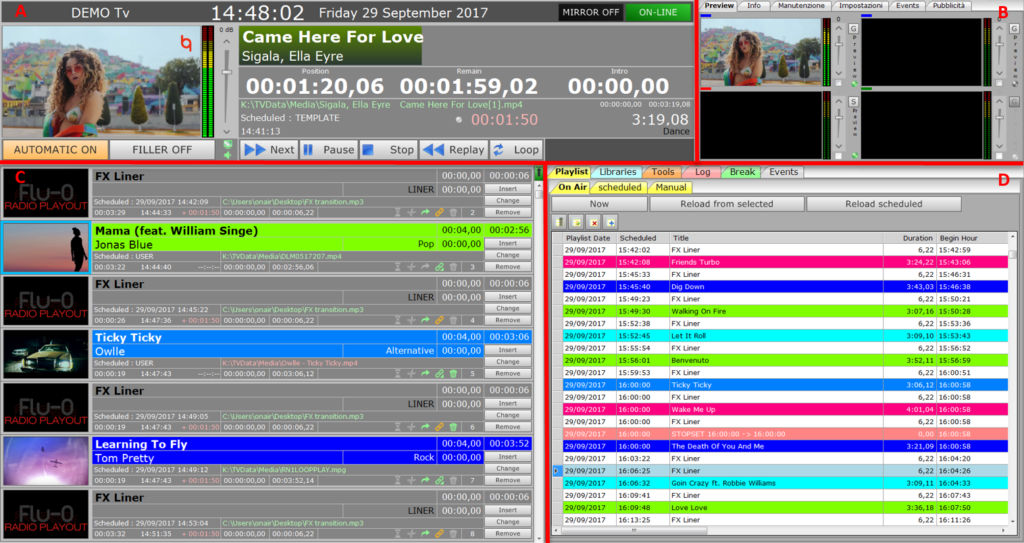
The user’s workspace is divided into 4 parts:
- A => data on the file in wave and operations related to it
- B => area of preview and general information
- C => playlist programmed with the relevant data
- D => database, log, tools for operations on playlists and graphics
Event on air (Area A)

- 1 => Mixer preview of what is going on the air. By clicking the right button on the preview you will see a menu that allows you to force the Field in use, the Aspect Ratio and set markin and markout for the file on the air. The change is immediate and will not be applied to the database.
- = 2> Title and author of the file
- 3 => name and file path
- 4 => File length
- 5 => Position to which came the play
- 6 => Time Left
- 7 => Lead / Lag than at the scheduled time or the next STOPSET
- 8 => Enable / disable preview video / audio
- 9 => Now start airing
- 10 => Programming Mode File
Commands

|
If “Automatic” is OFF starts playing the first file in the playlist, if you had previously been clicked the Pause button, starts play again |

|
Pauses the event broadcast |

|
Delete the selected device |

|
Stops the event on the air and set to “Automatic” to OFF |

|
Stops the event on the air and tries the next |

|
At the end of the wave file in the program will pass automatically to the next file |

|
At the end of the wave file in the program will stop waiting for commands |

|
In case of necessity-Flu or automatically provided to fill any holes with the preset file as fillers in Philo |

|
By clicking the button Loop the file will be broadcast on the air loop until the loop is disabled or until you press the NEXT button. |

|
Click on the Replay button to play the file on the air start from the beginning. |
Preview and general information (Area B)
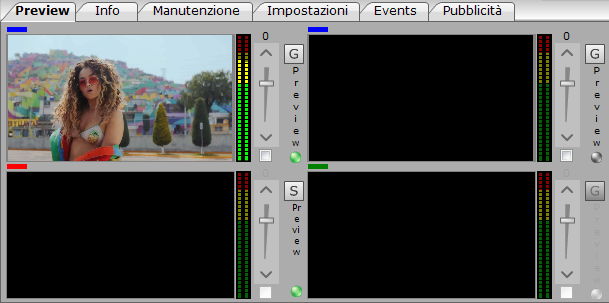
Top, preview the file played and preview the first frame of the next file. Preview enabled inputs. By clicking the G key right of every preview can be managed quickly and direct the stream graphics (see Template CG Manual).
Click on the S button to open the input configuration windows.
Input Preset
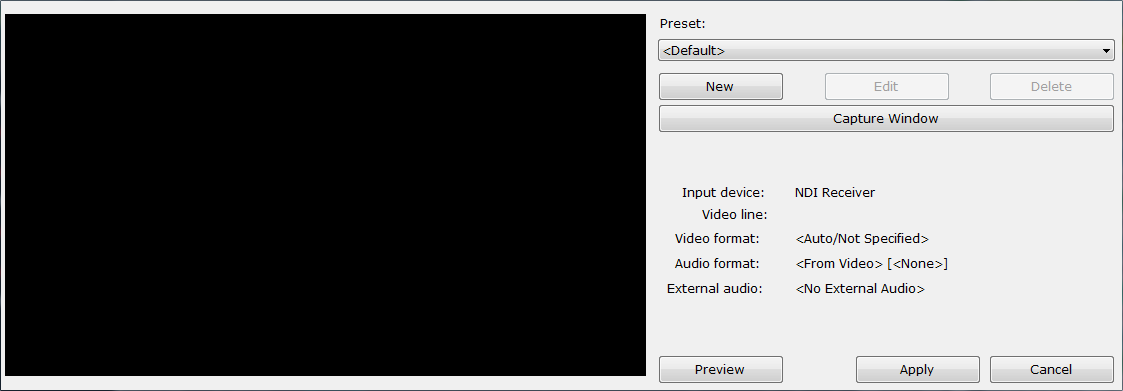
User can select one of the previously configured preset or create a new one.
Preset: select one of the previously configured preset from the list. (“Default” indicates the setting set in the Flu-O Playout Configurator)
New: Open a new configuration window.
Capture Window: Capture a screanshot.
Preview: show the preview of the selected preset.
New preset
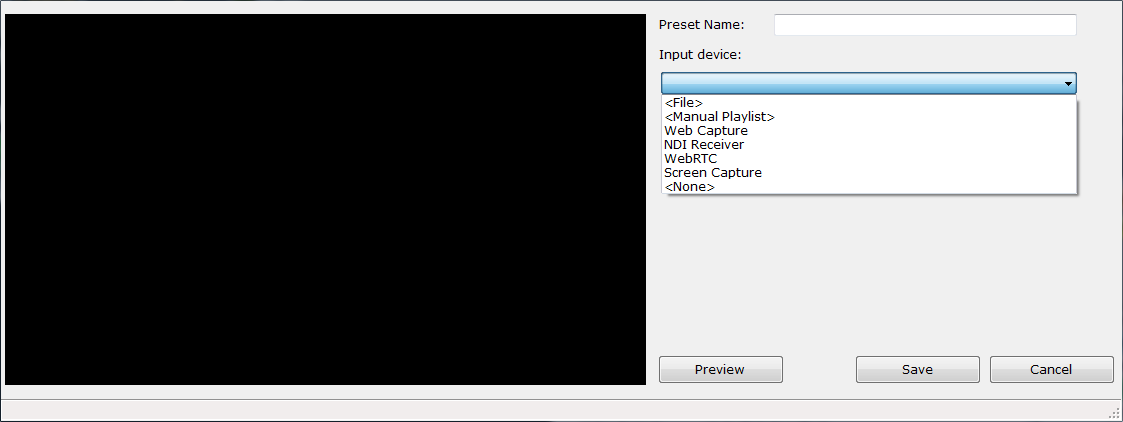
Preset Name: type the name of the new preset
Input device: list of the available device.
- File and Manual Playlist: user can select a file from the PC or a manual playlist among those creatd on Philo Media Manager.
- Web Capture: type in “Video line” the streaming RTMP to play
- NDI Reciever: select the NDI signal to play. Press the R button to refrash the NDI signals.
- Screen Capture: select the screen to view
- Other Device: list of input devices installed
For all of these options, it is possible to specify the audio and video formats.
Click on Apply to select the preset and it will be played on the selected stream.
Events
Here FluO show the next event that will be played by the player, with the indication of the expected time, the countdown and its content.
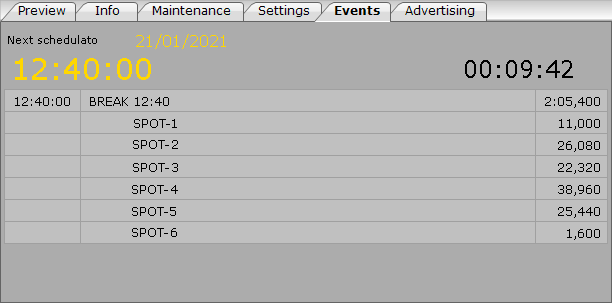
If the event is into the Template Automation and not in the scheduled list, are indicated “Next from Template Automation”. Otherwise, if the event is into the scheduled list the word is “Next scheduled”
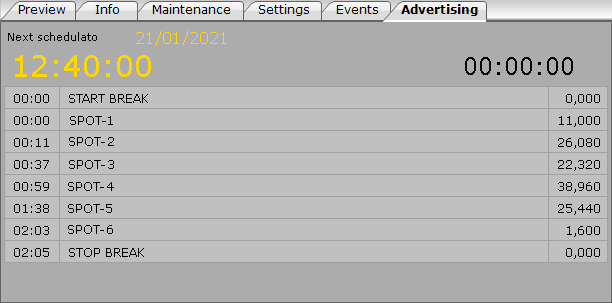
Advertising
Allo stesso modo nella sezione Advertising viene visualizzato il prossimo break che verrà riprodotto dal playout.
Playlist (Area C)
In this area you will find the complete list of what makes up the playlist; for each element are specified several data such as title, author, time programming, duration etc.

- 1 => Image
- = 2> Title
- 3 => File length, by Markin at Markout
- 4 => Author
- 5 => Time to airing
- 6 => Day and hour programming, or programming mode
- 7 => delay expected by time programming
- 8 => Now airing real
- 9 => Markin
- 10 => Markout
- 11 => If the icon is green it means that the file is Adjustable, so if necessary, in the presence of a StopSet for example, can be reduced automatically using the duration parameters Intro and Outro
- 12 => If the icon is green it means that the file is suspendable. then in case of need the file can be removed from the playlist
- 13 => If the icon is green it means that the file is linked to the next file
- 14 => If the icon is green, the file will be skipped and will go directly to the next file
- 15 => Indicates the location of the files in the playlist
- 16 => To insert a new element in the playlist, click the Add button and select the file from the database; the file will be inserted before the one on which one is positioned to perform the insertion
- 17 => To change a file already loaded, click on the Change button and select the new file from the list on the right
- 18 => To remove a file, only prevents this list, click Delete
If the path and file name are in red it means that the file is missing.
By clicking with the right mouse button on the record, you’ll see a menu with several options:
- Trimmer: It allows you to edit and markin markout file directly from Flu-O
- Cut Deletes the selected item from the playlist
- Copy: Copy the selected item
- Paste: Paste the position where the mouse is on the copied item or cut
Trimmer
Thanks to the trimmer you can set markin and markout a file directly from the playlist; the changes will apply only to the file in the playlist and will not be saved in the database, where the file will continue to maintain the same values. Click Trimmer will see a new tab in the upper right corner (Area B).

Dragging the cursor on the bar or using the Play, (-) Sec 1, (-) 1 Frame stand on the points markin and / or markout and secure them by pressing their button. Click Reset to finish and apply the changes, Undo to return the values to the original and continue editing, Cancel to cancel the change and close the window.
Playlist, Libraries, Log, Tools (Area D)
Playlist
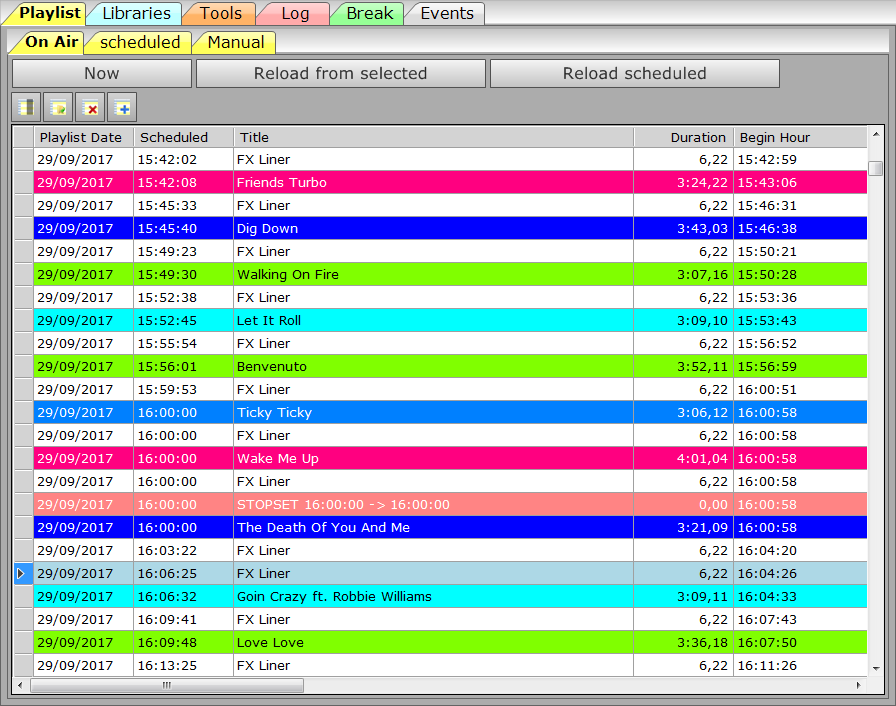
On Air
displays the list of all the files have been supplied and those planned.
- If the programming was done originated in Philo as schedule, it will be reported in the column Scheduled fee for the airing.
- If you loaded a playlist manual will be reported Palimpsest Manual.
- If the item was entered by the user directly in Flu-O, the words will be User.
The information already provided are displayed in italics.

|
Place the playlist on the corresponding line item on the air at the moment when it is pressed. |

|
Charging the playlist from where you are positioned, including manual changes, the list of the left. |

|
backs reload the playlist. |
Scheduled
Show the entire element list scheduled by Philo Media Manager.
It’s possible to select other scheduled days lists.
Manual:
list of manual playlist available.
Click on Clear Playlist to empty the list from all the scheduled items. 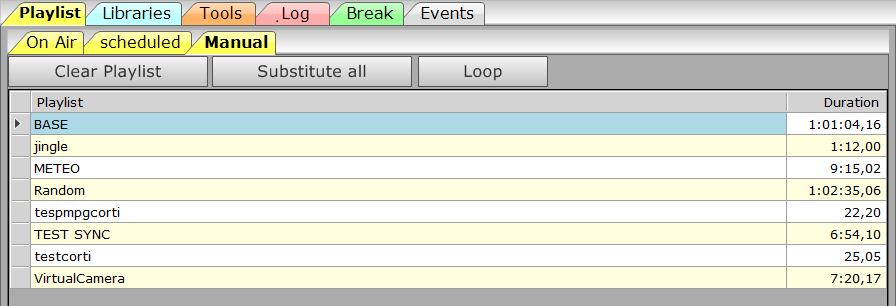

|
Clear the playout list |

|
Substitute all the playlist items with the manual playlist content |

|
Execute all the playlist items in loop |
Libraries
All the archive entered and managed by Philo Media Manager is here available to the user for a quick entry into playlist. Per enter a new file click the Enter button in the left list and double-click the item that you want to enter choosing from the list of the database; the file will be inserted before the element that has been pressed Insert. Per replace a file already in the playlist, press the Change button at what you want to replace with a double click and select the new file.
Tools
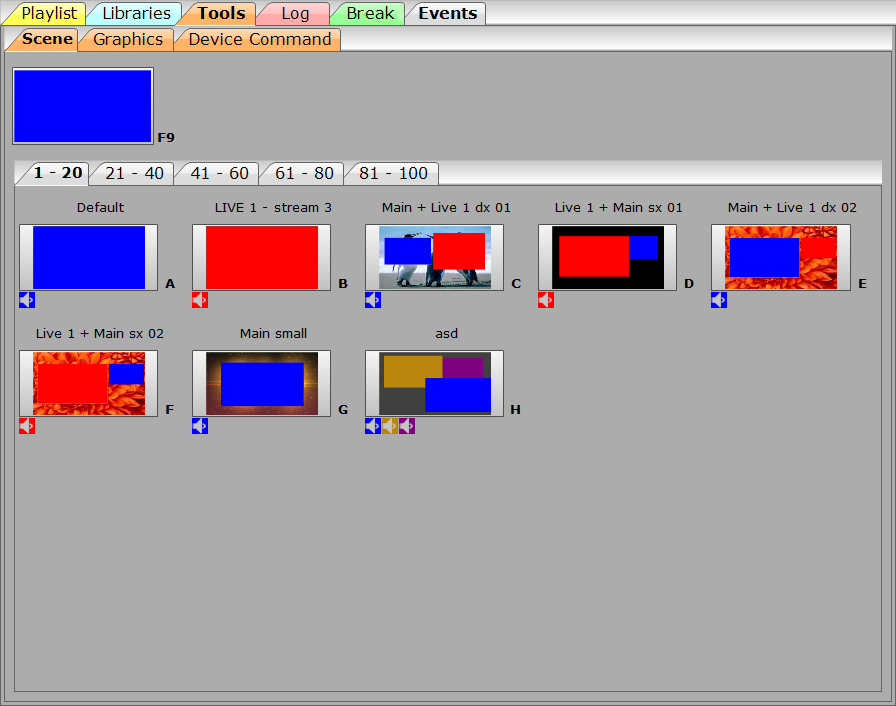
Scene
The term scene identify the layout of transmission; in each scene, you can set the size and position of the stream, deciding transition time audio and video, enabling and disabled audio, assigning predefined shapes, edges, tilt etc. Ad each scene created with Template CG It corresponds to a button with an image preview and its name; clicking on the corresponding scene will be applied immediately.
Graphics
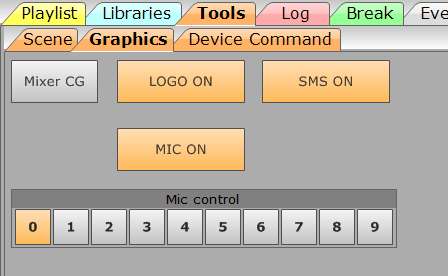

|
Open the form of control of the graphics |

|
Toggles the display of the logo |

|
Toggles the display of SMS |

|
Rereads the database |

When FluO receive the command from the Microphone Detect, the playout execute the automation selected in the Mic Control section.
Output control
In this section user can manage the auxiliary video ouputs and the graphics application for each one. In this way, can manage a clean signal usable as a replica.
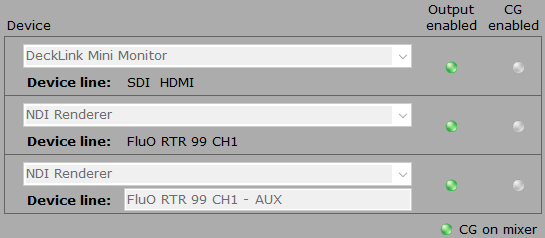
Output Enabled: enable or disable the selected output device.
CG Enabled: enable or disable the main graphics on the output selected
CG on mixer: enable or disable the graphics on the main output and enable the “CG Eneble” control of the auxiliary device.
Commands to devices
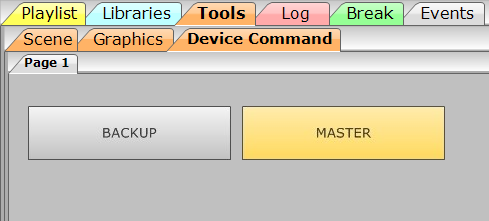
Under Device command are all keys associated with external controls, these controls are set in Philo Media Manager.
Log
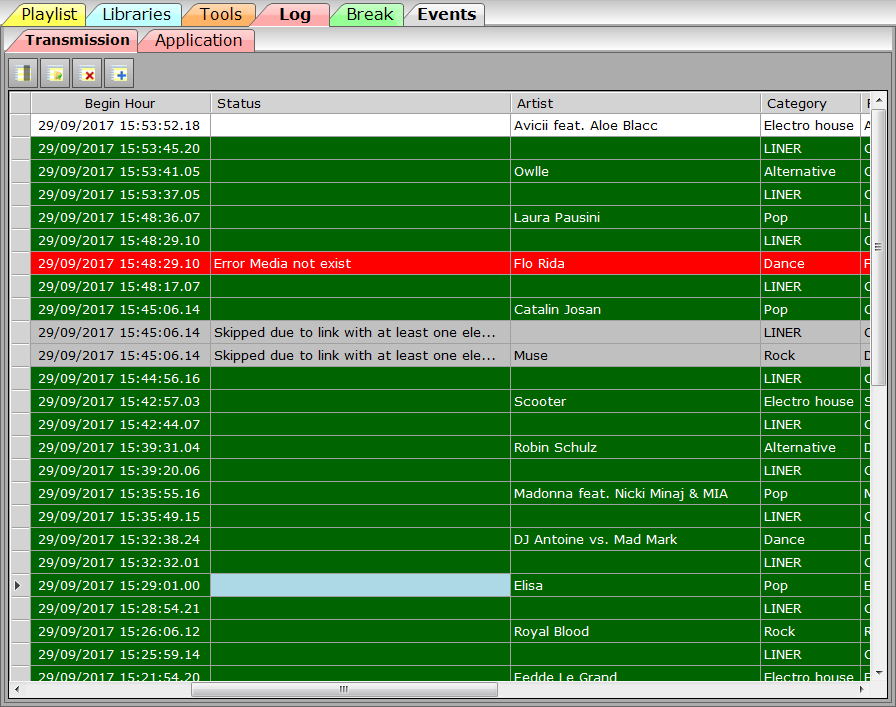
Transmitted
- White: item aired
- Green: file transmitted properly
- Yellow: output file interrupted, the Status column indicates the reason for the interruption
- Red: The file was not sent and the Status column indicates the reason
Application
Displays the list of all the operations that the playout plays, both automatic and controlled by the user: file preparation, sending parameters to the graphics, adding, done away, exchange files etc.
Break
In the Break section is the list of scheduled commercial breaks and at the bottom the details for each.
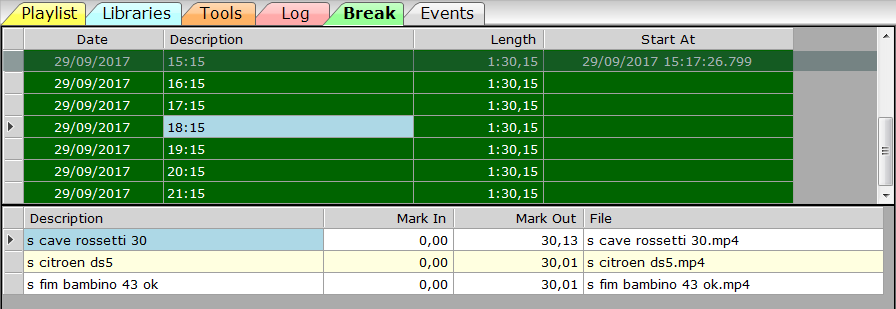
Events
In the Events section, user can view the scheduled week events with the item contained. 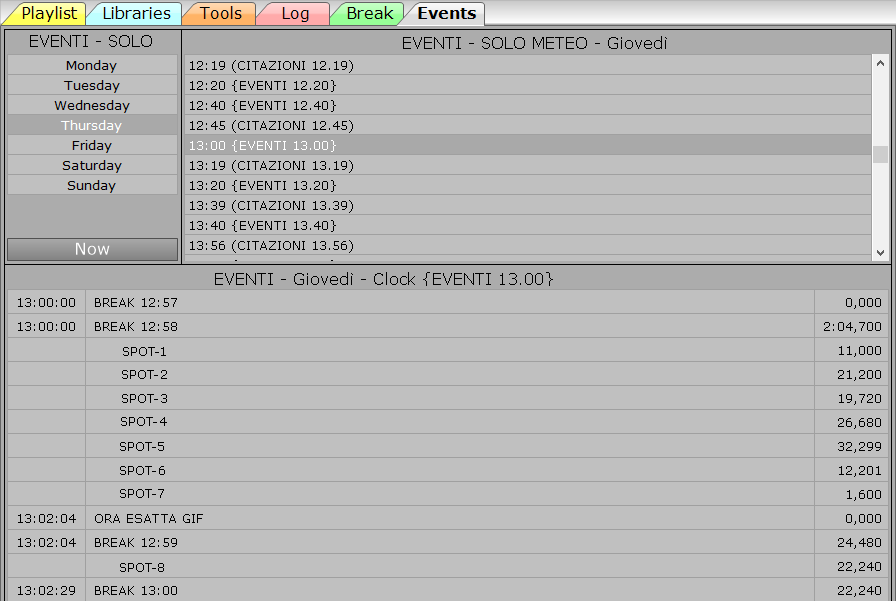
Click on the days to navigate into the week. Click on “Now” button to jump to the next scheduled event. On the right are listed all the events of the selected day. In the bottom are listed the event content.
User can drag and drop any event to any position of the playlist.
Flu-O TV – Quick start guide
First use
Configure the Playout
After installation you will find the icon on your desktop TV Playout Configuration, open the program, click on the Edit button.
Device
- Resolution: Choose the screen resolution (eg. 720×576 PAL 4: 3)
- Background: Select the color of the video in the absence of images (eg. Black)
Graphic Default
- Startup ON / OFF (if ON starts playing the playlist at the opening of the program)
- Filler ON / OFF (if ON failing playlist will automatically send the files included in the playlist FILLER
Input
- Sets the / the source for the inputs
Possible settings are:
- File: The commands for setting the stream can be entered in a configuration file related to the video card
- Playlist manual: you can create a playlist manually in Philo and match it to the stream
- Video card specification
Press Save to save your changes.
Basic functions
Insert, change, remove a file

Click the Add button and select a file from the database; to access the database, managed by Philo, right-click the Libraries tab and choose the table from which you want chose. Il file will be inserted before the one on which we are positioned to make the insert. Se the Playout is Autorun the file will start immediately, otherwise click Next; for the end of the inserted file playout automatically switch to the next is necessary that the software is set to AUTOMATIC ON. To change a file already loaded, click on the Change button and select the new file from the list of right. Per remove a file, only prevents this list, click Delete.
Drag and Drop
User can put files in the lineup even with the drag and drop. Select the list of library file and drag it into position in playlist. Con Drag and drop you can also change the order of execution of items in playlist.
Upload Playlist Manual
To load a Manual playlists created in Philo scroll right to the tab Palimpsest => Operations and drag the play list on the left. The loaded playlist will be broadcast loop until further notice.
Reload Playlist and positioning

|
Place the playlist on what is sending the instant you press. |

|
Charging the playlist from the point where it is positioned in the left. |

|
backs reload the playlist. |
Flu-O TV – HowTo
Quick Change Markin and / or Markout
Normally markin and markout files are managed in Philo Media Manager But by Flu-O you can act quickly on files already in playlist without affecting the data in the database, to do this click with the right button on the row corresponding to the file and select Trimmer.

It will see a new tab in the upper right corner, dragging the cursor on the bar or using the Play, (-) Sec 1, (-) 1 Frame stand on the points markin and / or markout and secure them by pressing the appropriate keys. Click apply to finish and apply the changes, Reset to restore the values to the original and continue editing, Cancel to cancel the change and close the window.
Enable / Disable graphics
To activate a graphic you must first have created it in Template CG Then have inserted in automation Philo. In addition to the graphics more or less elaborate in Philo also we recommend creating an automation of default, based on the main stream and only with what logo. In Flu-O just click with the right button on the corresponding line and select Run.
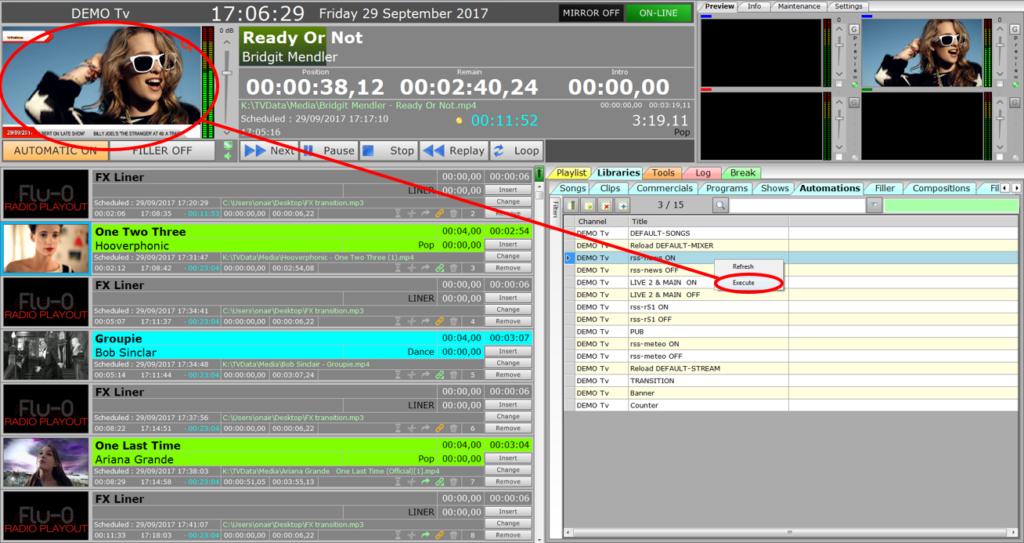
To deactivate follow the same procedure but the default graphic.
Enable / Disable individual elements of a graphic
To turn on and off individual elements of a graphic is necessary first to have created the generic automation of key graphics (Philo – Automate Graphics) .The Second operation is to create the automation of ON and OFF of the individual elements to be managed. After preparing the automations in Philo steps for activation / deactivation of the graphics in general.
Changing scenes (stream)
Scene change means applying a specific layout to broadcasting, such as switching from one stream to another or play in 2 different positions and sizes. Per do so you must have set the scenes Template CG, This automatically generate keys in Tools Flu-O Playout. To change a scene simply click the corresponding button.
