Installation
Launch Setup_TemplateCG.exe and follow the indications.
We suggest to install TemplateCG in the suggested folder (C:\Program Files (x86)\BitOnLive\Template CG).
License Updater
After installing the software open the menu Avvio di Windows -> BitOnLive-> License Updater
Insert your e-mail address and the code to activate your licence.
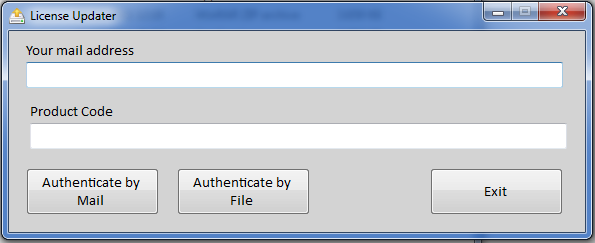
You will receive an email from license@bitonlive.com containing a file, save it to your desktop and start Template CG to activate it.
Features
Function keys

| Create new configuration file |

| Load configuration file |

| Save configuration file |

| Save configuration file with another name |

| Change software language |
 
| Lock/Unlook the composition. To make changes must be unlocked |

| Display selected composition, show preview and items list |

| Close selected composition, hide preview and items list |

| Close all composition |

| Delete selected composition/items |

| Save composition |

| Move up the selected item: 1 row in the items list. First position is background |

| Move down the selected item: 1 row in the items list. Last position is in the foreground |

| Apply the changes made to the item and displays the preview |
Workspace
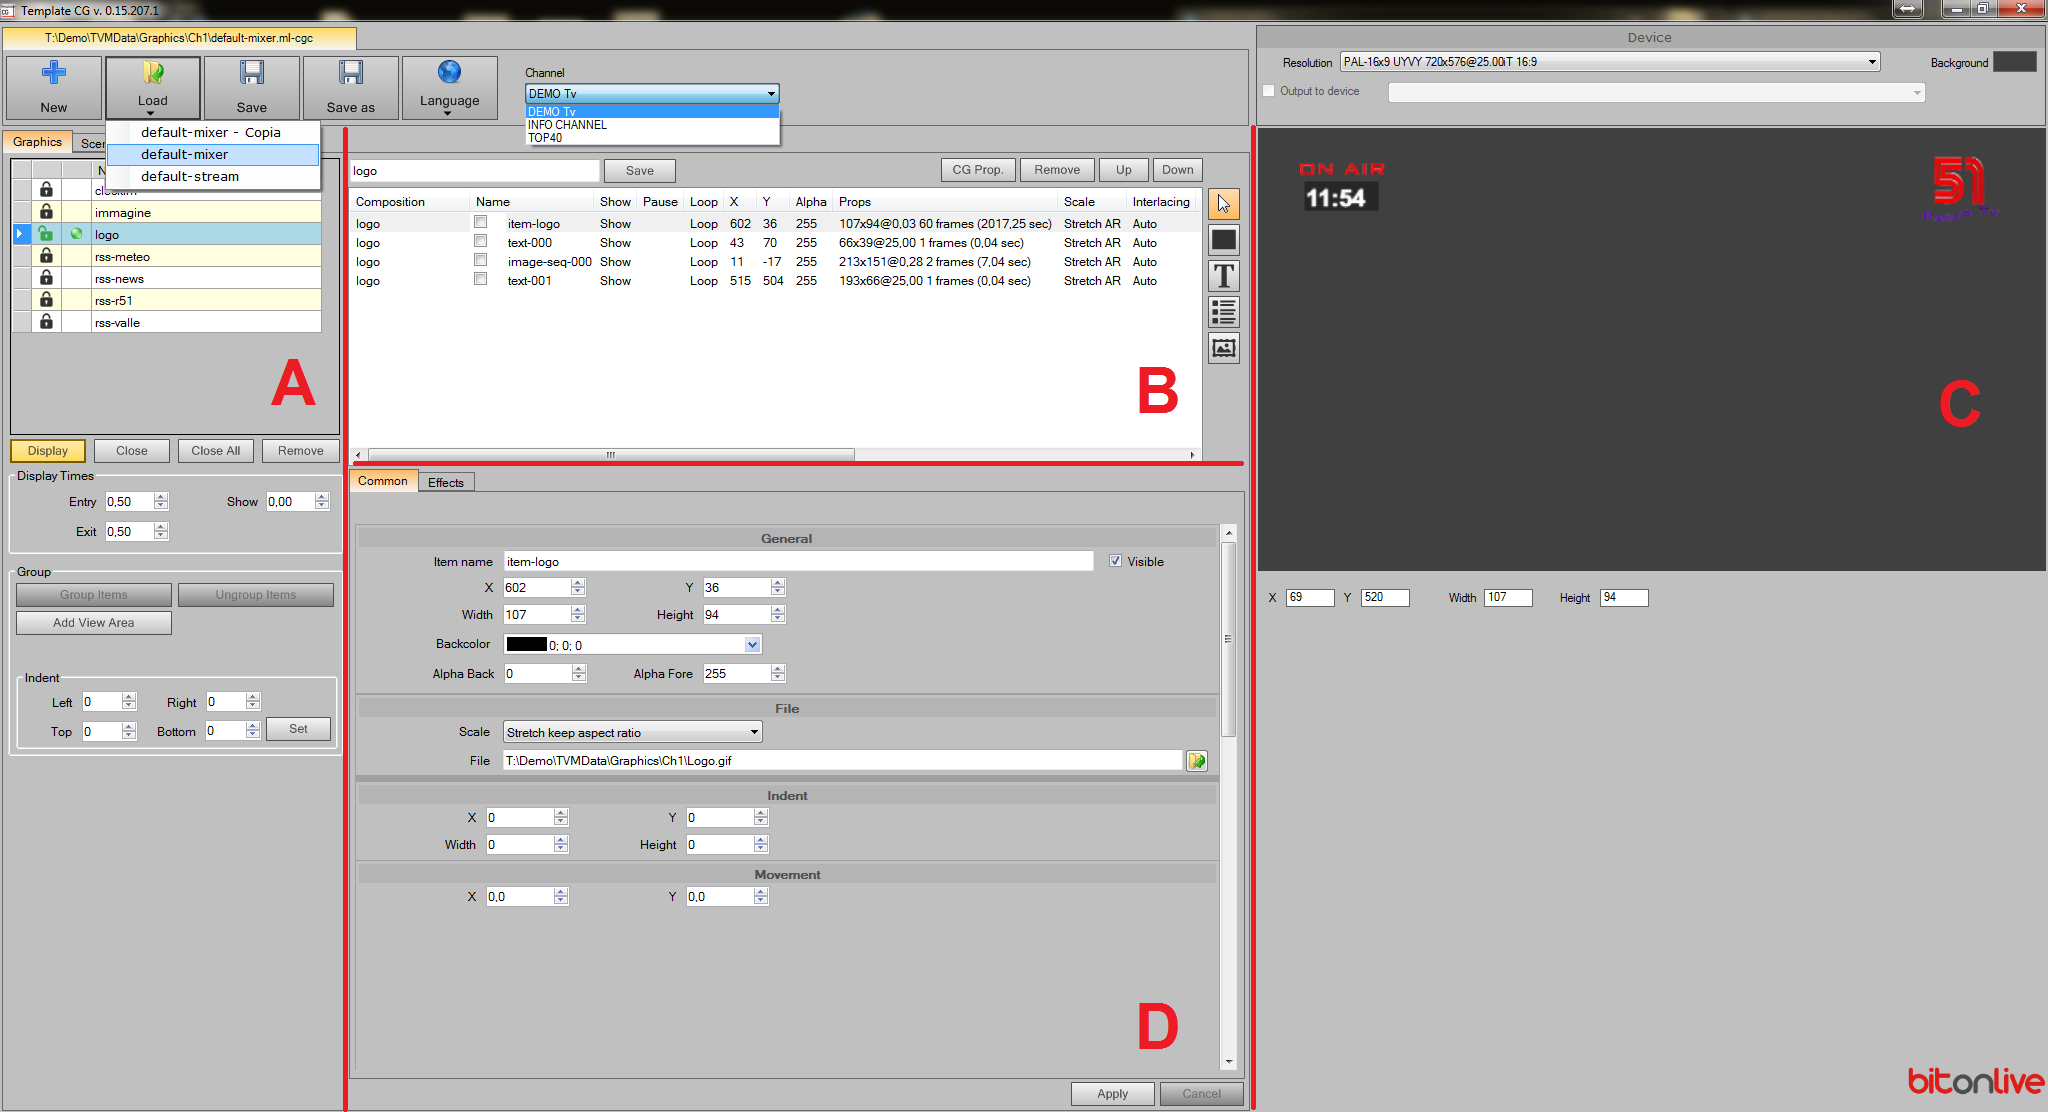
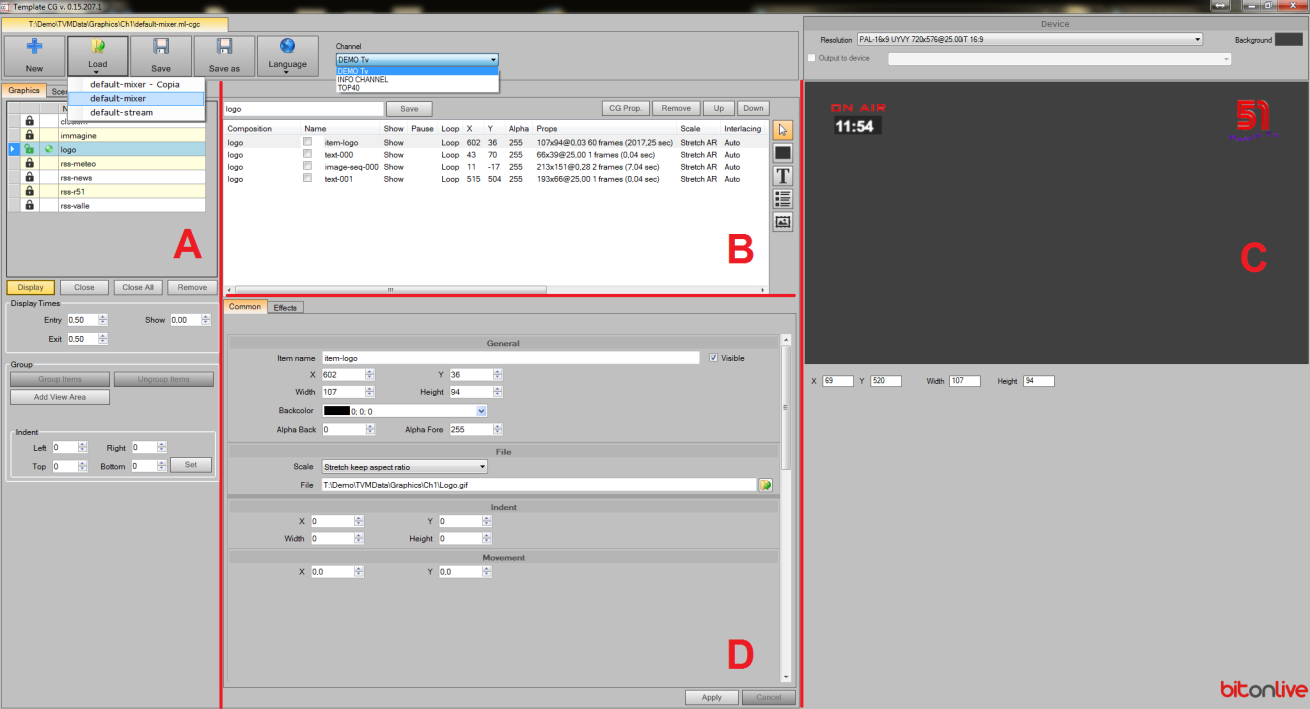
The workspace user is essentially divided into 4 parts:
A => list/management compositions
B => list / management items (that form the compositions)
C => preview and display settings
D => management elements that form the compositions
To display the elements of a composition, select the composition in the list and press the A area button Display.
To edit an item, select it in the top of B area and use the tools appeared in the lower area; press the Apply button to apply momentarily the changes and see a preview in C area.
Device
In the Device area you can manage the basic settings of the device for which you are creating the graphics.
- Resolution (ex. “720×576 PAL 4:3”)
- Background (background color for the preview area)

Position and size
To set item position and size use the mouse to drag and resize or use this control panel:
- X: horizontal position, from left to right
- Y: vertical position, from top to bottom
- W: object width
- H: object height

Indent
Change the values of Indent, are zero by default, to indicate the indent to the position of the object.
- Left: positive value moves the object to the right, negative to the left
- Top: positive value moves the object downwards, negative value upward

Movement
Change these values if you want the object is in constant motion.
- X: horizontal movement, positive from left to right, from right to left negative
- Y: vertical movement, positive downward, negative from the bottom upwards

Alpha
Is the transparency of the object, 255 is the maximum value that indicates the solid color that is no transparency, 0 is absolute transparency. For the background you can choose the color by clicking on the black square.
- Back: background transparency (0-255)
- Fore: object transparency, background included
Effects
On-Show – On-Hide
You can select multiple effects to apply to the object being viewed (On-Show) and disappearance (On-Hide), these effects are:
- Fade
- Blur: XY (horizontal and vertical blur)
- Blur: X (horizontal blur)
- Blur: Y (vertical blur)
- Move: Left (moves from / to the left)
- Move: Right (moves from / to the right)
- Move: Top (moves from / to the top)
- Move: Bottom (moves from / to the bottom)
- Squeeze: XY (expands / compresses vertically and horizontally at the same time)
- Squeeze: X (expands / compresses horizontally)
- Squeeze: Y (expands / compresses vertically)
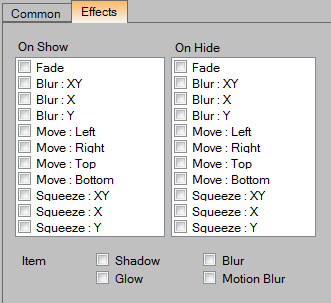
Item
These effects however, if selected, are always applied to the object.
- Shadow
- Blur
- Glow
- Motion Blur
Graphic
 Graphic objects are geometric shapes where you can customize the size, position and color.
First you need to assign a name to the object, type it in the Item Name, then select the type of shape preferred. The software provides the following forms:
|
|
|
| 
Block-3 |
|
|
|
| 
Rect |
Text
To add text item select
 and draw the object in the preview; this type of object is fully customizable, from the size to the font type and the content is static, this means that you can change it only by the software.
Set the Item Name, select Type (text, date, time), insert text.

Set font type, size, color.

To create a dynamic text select object Ticker.
Ticker
Ticker are objects that allow the management of texts sliding, on one or more rows, in horizontal or vertical, with or without graphics and images; the contents of the ticker is dynamic and text can be taken from .txt, .csv or RSS Feeds.
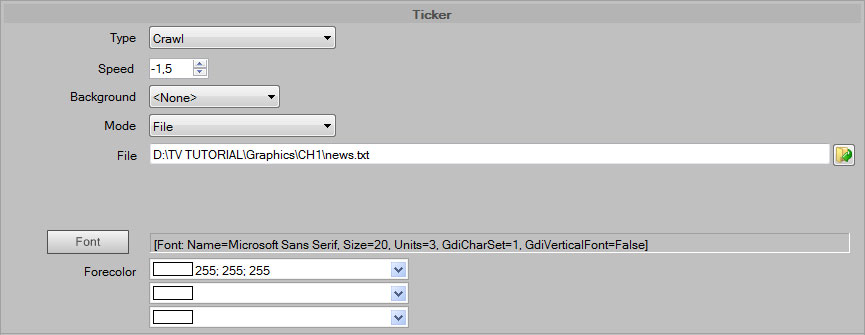
Set Item Name and select ticker type:
- Crawl: it is single-line text that scrolls horizontally
- Roll: the text may be multiple lines and runs vertically
- Ticker (n. row): text appears and disappears according to the effects selected in the Effects, the lines displayed are those of the type chosen ticker.
The scroll direction is given by the negative or positive value of the speed, field Speed:
- negative: horizontal scrolling from right to left, vertical scroll from the bottom upwards
- positive: horizontal scrolling from left to right, vertical scroll from top to bottom
Text sources:
- Text: is static text that can be edited only by software
- File: text ticker is taken from a file then will update every time will be updated the contents of the selected file
- RSS Feed: the contents are imported from the .xml page indicated, the page can be on an external website, and then the connection to the internet is required, or it can be managed through the Content Manager
File
Click
 to add a file; you assign a name to the object, select the file and set the position and size.
It’s possible add images file (.jpg, .gif, .png, etc.) or animation file (.swf)
Scene
The term scene identify the layout of transmission; in each scene, you can set the size and position of the stream, deciding transition time audio and video, enabling and disabling the audio, assigning predefined shapes, edges, etc. inclination.
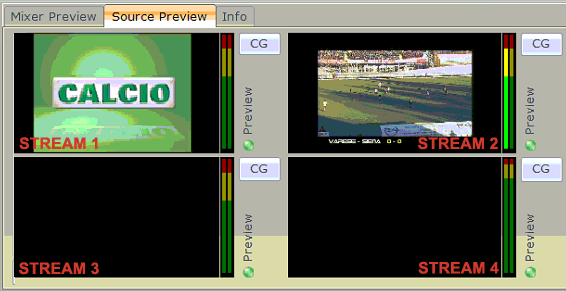
For each scene created a corresponding button in Flu-O with image preview and its name; clicking on the corresponding scene will be applied immediately.
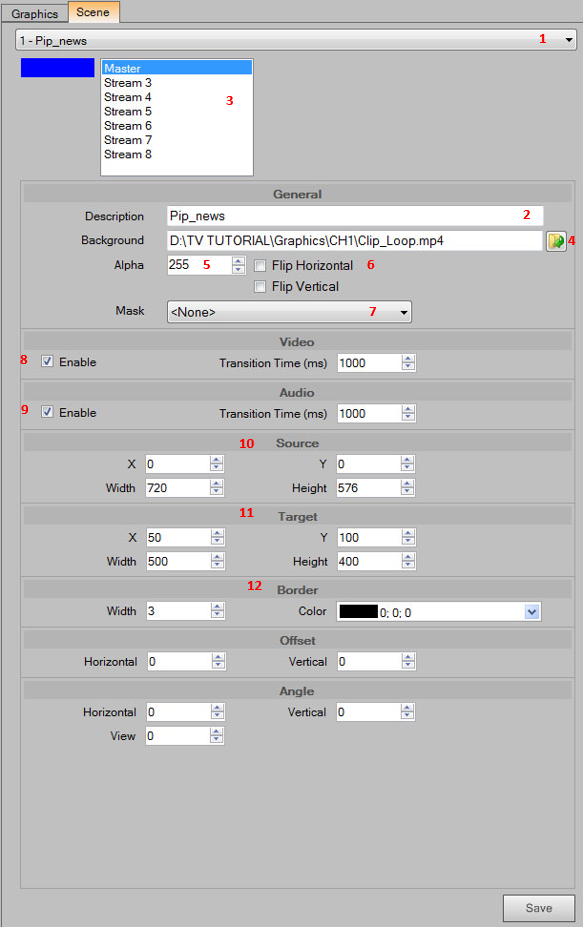
The options of creating a scene are:
- 1 – Select the scene to modify or on the first empty line to add new scene
- 2 – Add or edit the scene’s name
- 3 – It’s a Stream list: Master is the default, the other stream are customizable in the Flu-O Playout configuration. Select the stream what you want to change
- 4 – Select the file for the background (optional)
- 5 – Alpha (0- transparent -> 255-full color): is the transparency of the stream
- 6 – Flip (Horizontal – Vertical): the effect will be that of a rapid and continuous movement in the vertical (up / down) or horizontally (left / right)
- 7 – Mask (Circle – Rectangle – Rounded rectangle): select an item from the list to apply a mask (form) to the stream, at the same time there will be a soft edge.
- 8 – Check Enable to activate the video for the stream selected and set the transition time, in milliseconds
- 9 – Check Enable to activate the audio for the stream selected and set the transition time, in milliseconds
- 10 – Source: position and size of the stream you want to capture, the default values are X = 0, Y = 0 Width = 720 Height = 576, the screen starting from the top left
- 11 – Target: final position and size of the stream
- 12 – Stream border and color
Template CG – Quick start guide
 First use
The workspace user is essentially divided into 4 parts:
A => list/management compositions
B => list / management items (that form the compositions)
C => preview and display settings
D => management elements that form the compositions
To display the elements of a composition, select the composition in the list and press the A area button Display.
To edit an item, select it in the top of B area and use the tools appeared in the lower area; press the Apply button to apply momentarily the changes and see a preview in C area.
Add logo station
Open Template CG, click LOAD, select default-mixer.ml-cgc (your SharedFolder\Graphics\Ch1\)
Select composition logo, unlock composition and change file name, position and size.

the logo file must be in the shared (SharedFolder\Graphics\Ch1\)
Click Apply to see the preview.
Save the composition
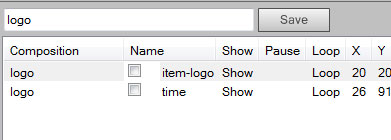
And save the file


