Istant Player is the hot key integrated in Flu-O Radio Playout that allows you to create sound panel with bases, effects and all kinds of audio component for supporting the live.
It is part of the package of BitOnLive external applications, added to Flu-O Radio Playout.
Installation
Launch the Setup_ExtApp.exe and follow the directions for installation.
Playout Configuration

Open Radio Playout Configuration, and click the Modify button.

Select the tab External Application and add the Instant Player by clicking
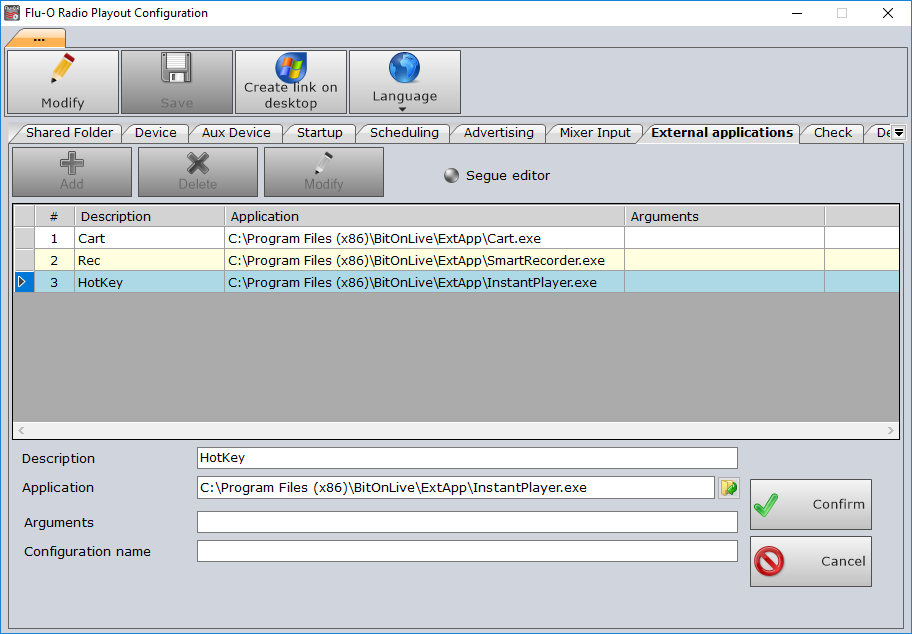
 Description: name for the Instan Player
Application: path and the .exe file name (you can also select it through the search button )
Argument: technical parameters to be determined with the assistance (we recommend you keep it blank)
Configuration name: configuration name for the creation of the system configuration

 after configuration click Confirm
Finally save the configuration with the button
View
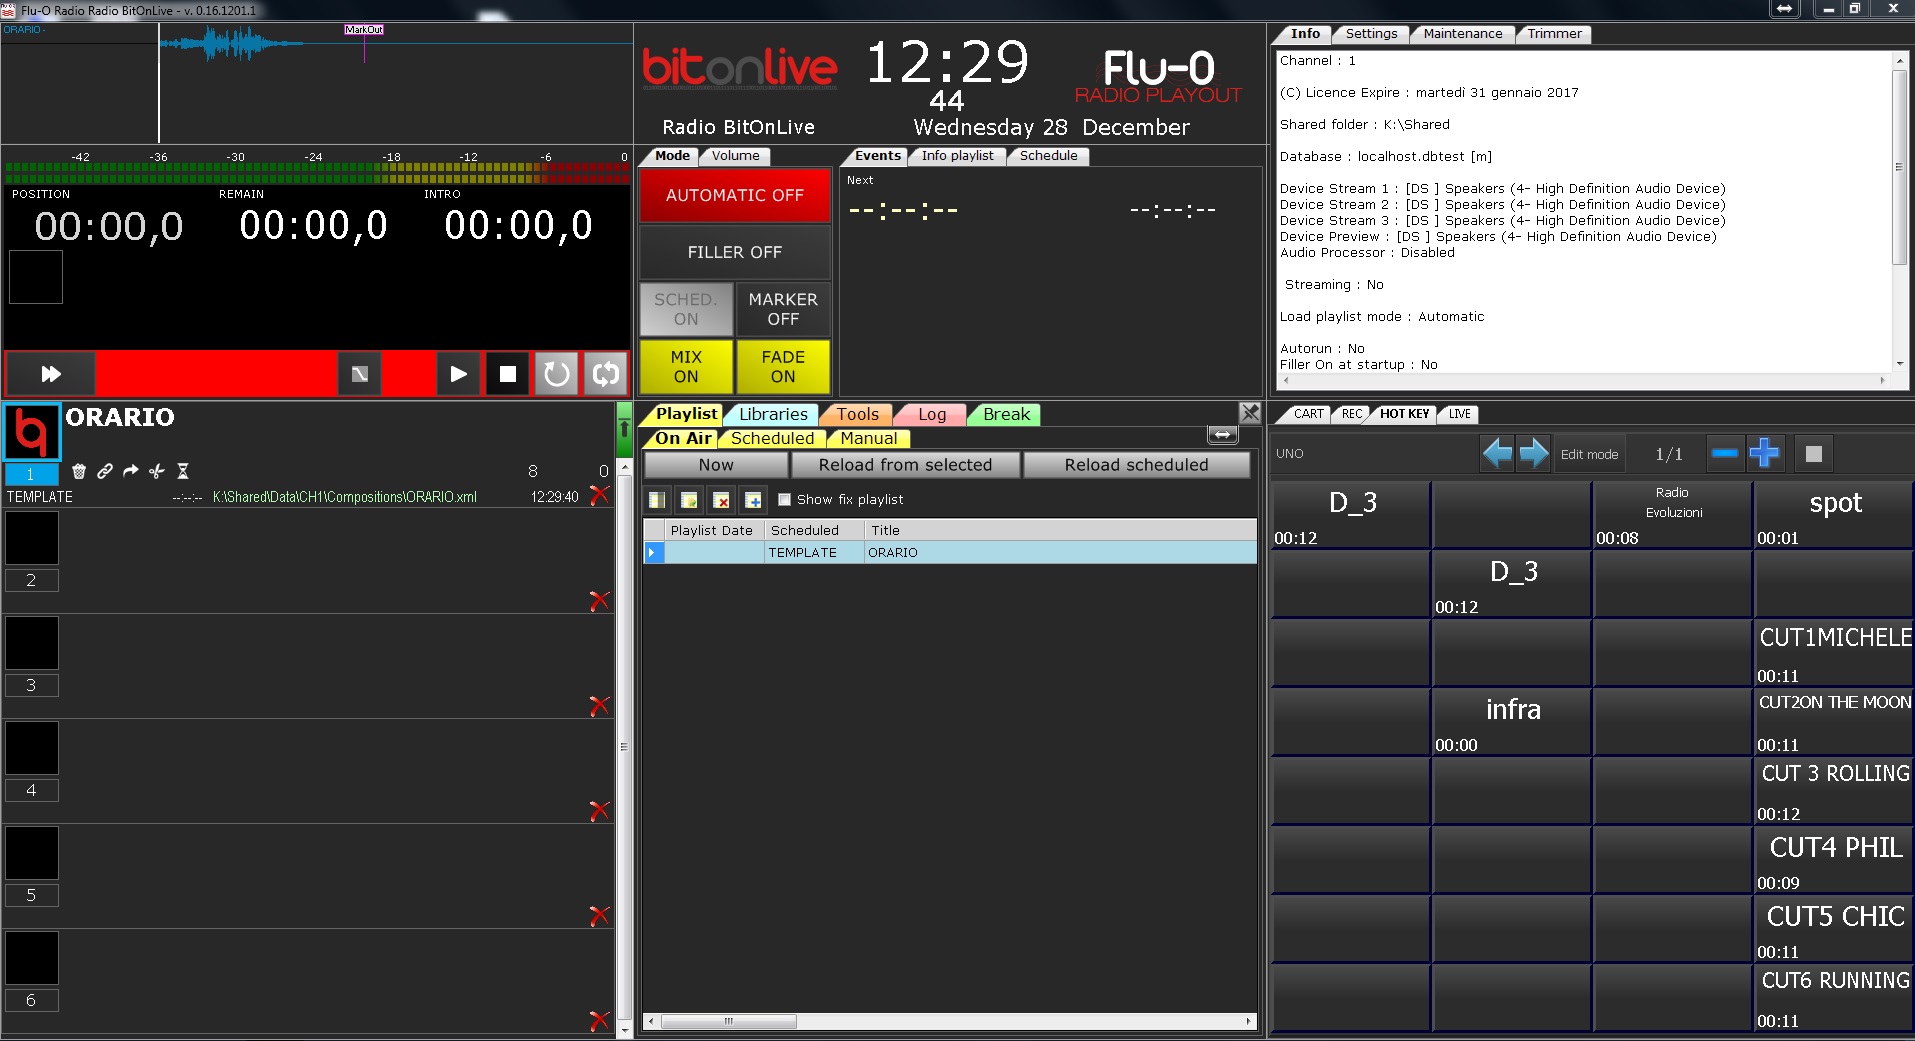
Once configured, open Flu-O Radio Playout, and it appears the new section relating to the external applications at the bottom right. The different configured applications are categorized into tabs by the names given during configuration.
First Use
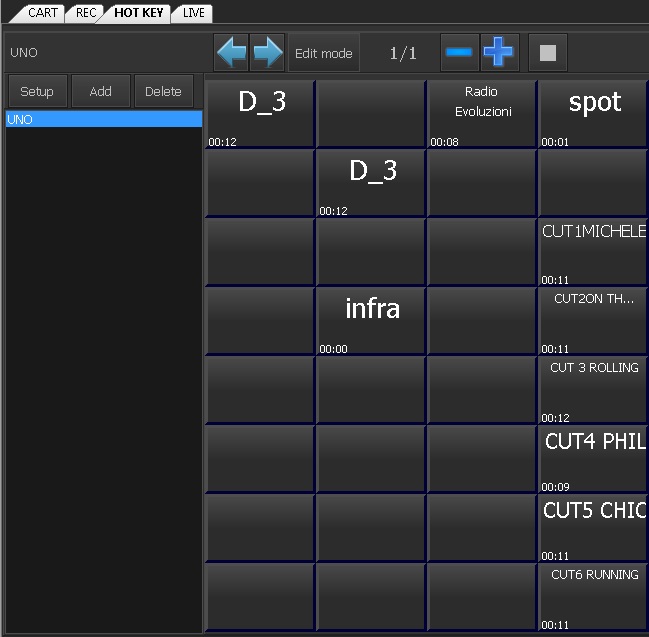
Click the button at the top left of the Instant Player section (“Click for setup”) to manage a new panel. In this way appears or disappears the column where noted all the list of user-created panels, and buttons for setting the various panels
Setup: selected panel configuration
Add: ass a new panel at the Hot Key
Delete: remove the selected panel from the Hot Key
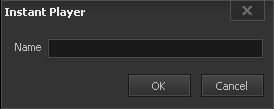
Click Add to add the first panel and in the window that appears enter the name, then press OK
Setup
Click Setup to open the configuration window
General
Configure the output signal settings for all created panels through the General tab.
.
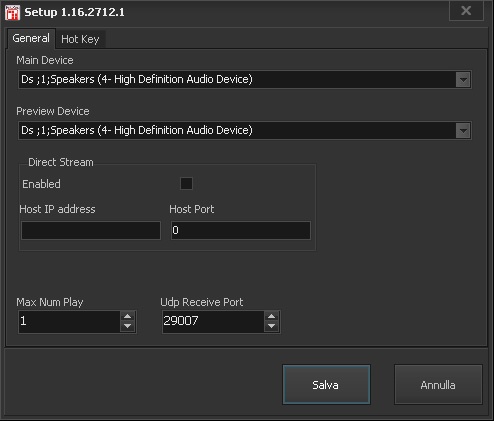
Main Device: select the main audio device
Preview Device: select the preview audio device
Direct Stream Enabled: enable or disable the TCP/IP direct stream
Host IP address: server IP address
Host Port: server communication port
Max Num Play: maximum number of play contemporary
Udp Receive Port: UDP port for external communication
Hot Key
This configuration change the settings only on the selected panel, the parameter may be different for each panel created.
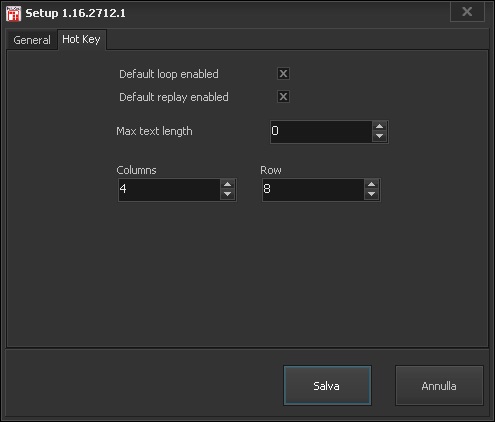
Default loop enabled: enable and disable the “loop” function an all the panel keys
Default replay enabled: enable and disable the “replay on click” function an all the panel keys
Max test length: maximum text length in number of characters
Columns: Number of columns of the panel
Row: number of rows of the panel
Function keys
: browse back and forth through all the created panels

: Edit the panel button color

 : browse back and forth through the panel pages
 : Stop all the button playing
 : Play the last played item.
How to use
Drag and drop any kind of audio item to add it to the panel
You can browse through the Flu-O Radio Playout library and select the file to be inserted and then drag it into the desired button at the panel.
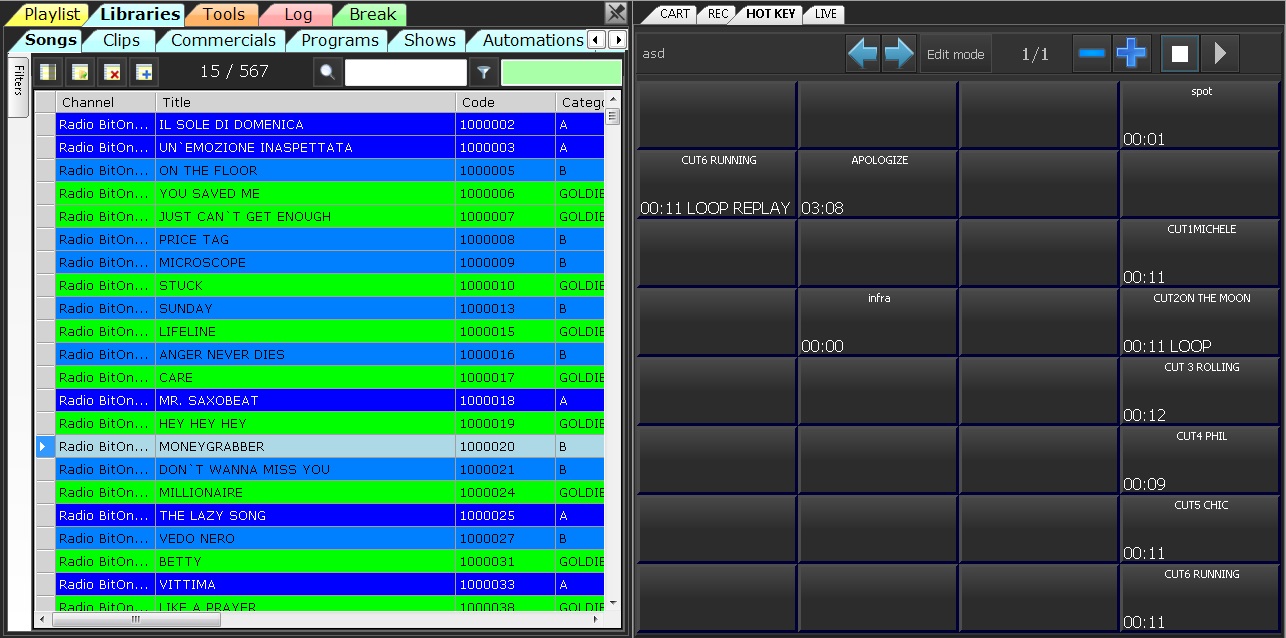
With the right click of the mouse shows the list of functions of each button of the panel.
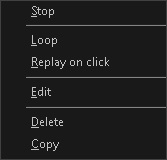
Stop: Stop the button play
Loop: Enable the loop function
Replay on click: Enable the repeat on click function
Edit: Edit the element marker
Delete: Unlink the button audio
Copy: copy the aduio element
Paste: Paste the audio element copyed
Edit Marker
Trought “Right click->Edit” you can edit the “Mark In” and “Mark Out”for each button panel.
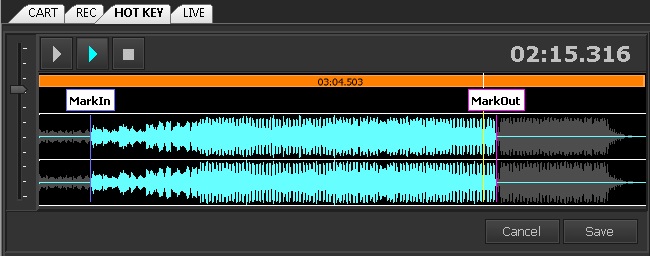
The play and stop buttons serve as cue on the selected track. The blue play button allows you to listen to the track regardless of the set marker, while the white play button allows you to listen only by Mark In and Mark Out.
To change the Marker drag and drop them along the waveform. You can also zoom the waveform through the mouse wheel to make the changes more accurately.
To change track volume use the fader on the left and move the cursor to the desired level.
Once you are finished making changes, select Save, and marker settings will be changed for the selected key.
Edit Mode

Click on Edit mode to edit the buttons colors.
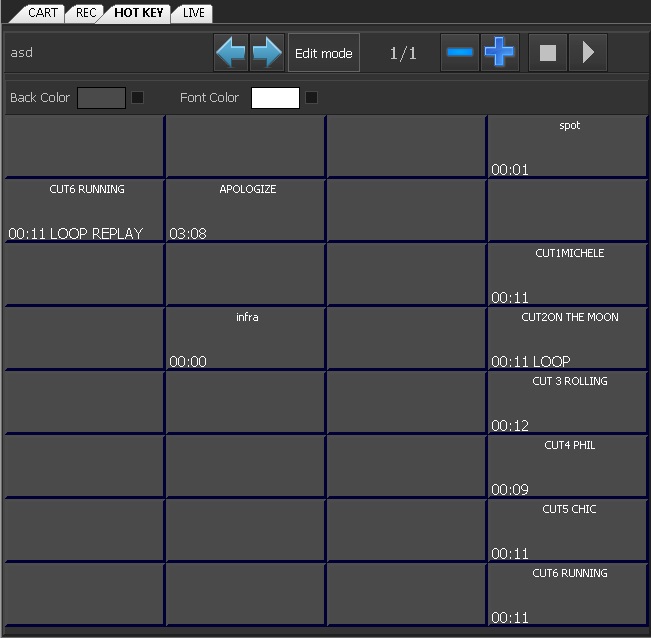
Back color
Font color
To assign the selected color to the button you need to enable the tick (beside “Back color” and / or “Font color”) and click on the desireds keys.

With a double click on the color box to open the selection colors window.
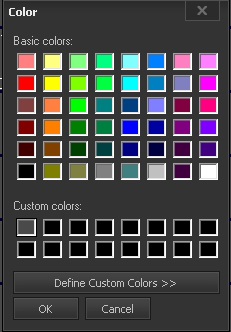
It proposes a series of basic colors (Basic colors) and a customizable color (Custom colors)
You can select the desired color through the click of the mouse and selecting the OK button.
To customize the Custom colors select one of the custom color boxes in the color table and click Define Custom Colors.
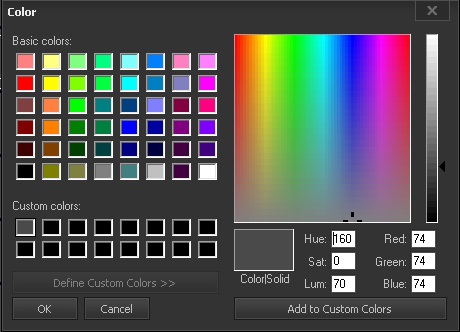
Is the section of the color palette, select the color you want and click Add to Custom colors.